A safe volleyball net setup starts with a system that matches the surface, the correct net height for your group, and even tension on both sides. Place the posts outside the court, measure the net at the center, and secure anchors without overtightening the equipment.
For a regulation indoor layout, the playing court measures 18 meters by 9 meters (59 feet by 29.5 feet). Men’s competition net height is 2.43 meters (7 feet 11 5/8 inches), while women’s competition net height is 2.24 meters (7 feet 4 1/8 inches).
Recreational, youth, beach, and adaptive play can use different heights, so confirm the rules before setting the poles. A basic portable kit can work well for casual play when its anchors suit the surface, while frequent use may call for weighted-base or permanent court equipment.
At a Glance
- Choose a volleyball net system designed for your surface: indoor floor, grass, sand, or another hard surface.
- Set the correct height for the group, then measure at the center and check both sidelines for an even net.
- Secure posts outside the boundary lines and use balanced tension to avoid sagging nets, leaning poles, and trip hazards.
| System Type | Best Use | Key Buying or Planning Consideration |
|---|---|---|
| Portable volleyball net kit | Occasional backyard games, recreation, and flexible setups | Check whether its stakes, guy lines, or anchors match the intended surface and whether replacement parts are available. |
| Weighted-base system | Indoor spaces or surfaces where ground stakes are not appropriate | Look at base stability, floor protection, storage needs, and the available clearance around posts. |
| Permanent posts | Dedicated courts, schools, clubs, and frequent organized play | Confirm facility rules, anchoring restrictions, installation requirements, and ongoing maintenance needs. |
The Fastest Way to Build a Safe, Playable Volleyball Court
The quickest reliable approach is simple: plan the court area, select surface-appropriate volleyball court equipment, set the proper net height, and perform a final tension and safety check. A net that looks usable from a distance can still have uneven height, unstable posts, or boundary lines that create avoidable problems. Start with the full setup rather than treating the net as a stand-alone item.
Start with the playing surface and available space
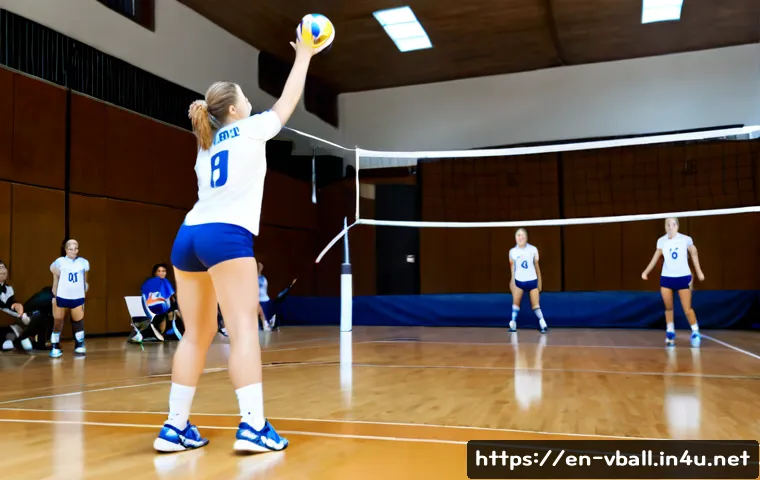
A regulation indoor volleyball court is 18 meters by 9 meters, or 59 feet by 29.5 feet. Even when you are building a smaller recreational court, mark the intended playing area clearly and leave a practical safety zone around it. Players need room to pursue the ball without running into posts, walls, benches, equipment bags, or spectators.
Surface matters before you buy or rent anything. Grass may allow stakes or guy lines, while sand may require anchors suited to sand. An indoor floor or hard court may call for a weighted-base system instead. Do not assume a portable volleyball net is appropriate for every surface; check the manufacturer’s intended-use details first.
Set the net to the correct height for your group
For men’s competition, the standard net height is 2.43 meters (7 feet 11 5/8 inches). For women’s competition, it is 2.24 meters (7 feet 4 1/8 inches). Youth, recreational, beach, and adaptive volleyball may use different heights, so a league, school program, or tournament organizer should confirm the applicable requirement.
Use a measuring method that reaches the center of the net. Then check both sidelines. The goal is not only the right center measurement, but an even setup from end to end.
Secure, tension, and recheck before play
Raise the net gradually and apply tension in balanced adjustments. Excessive tension can strain portable poles, anchors, net cables, and connection points. If one side is pulled tighter than the other, the net can lean, twist, or sag unevenly.
Before anyone plays, walk around the system. Confirm that posts are stable, straps and cables are seated properly, boundary lines are visible, and no anchor, line, or loose hardware creates a trip hazard.
Choose the Right Net System for Your Court and Budget
The right volleyball net system depends less on the net alone and more on how often it will be used, where it will be installed, and how it will be stored. A simple recreational kit may be sufficient for occasional games. Repeated use in a school, club, or community setting usually requires closer attention to pole durability, tension hardware, and replacement-part availability.
Portable kits vs. weighted-base systems vs. permanent posts
Portable kits are useful when the court must be moved or packed away. Their stability commonly depends on weighted bases, ground stakes, or guy lines, depending on the surface. A weighted-base system can be a more practical option when staking the ground is not suitable. Permanent posts can make sense for a dedicated court, but installation may be subject to local facility policies, permits, or anchoring restrictions.
Do not choose based on setup convenience alone. Consider whether the system can be safely secured where you plan to play and whether the available space keeps posts and support lines outside the active court.
What affects equipment cost beyond the net itself
A complete volleyball court setup may involve more than a net and two poles. Boundary lines, anchors, weighted bases, tension straps, replacement cables, storage considerations, and possible installation support can all affect the final equipment decision. Current product prices, rental rates, installation costs, and availability vary, so compare the full package rather than only the initial net listing.
Features worth paying for: tension straps, durable poles, and visible boundary lines
Useful features are the ones that make setup easier to inspect. Look for clear tension adjustments, stable pole connections, and boundary lines players can see during play. If a system will be used frequently, access to replacement parts can be as important as the original purchase.
For equipment comparisons, review the system’s surface compatibility, anchoring method, storage format, and available replacement poles, straps, cables, or boundary markers.
Step-by-Step Setup From Court Layout to Final Tension
Mark the court and leave a practical safety zone
Mark the playing area before placing posts. For a regulation indoor court, use the 18-meter-by-9-meter layout. Keep a clear surrounding area so players are less likely to collide with fixed objects or spectators. Place bags, benches, and other equipment beyond that clear space.
Position posts outside the sidelines
Volleyball posts should be positioned outside the playing court, not inside the boundary lines. This protects the usable court area and helps reduce contact with poles during play. Confirm the post locations before attaching lines, bases, or anchors.
Attach the net and raise it gradually
Attach the net to both posts according to the equipment instructions. Raise each side in small, alternating adjustments rather than fully tightening one side first. This approach helps keep the posts upright and avoids placing unnecessary strain on portable equipment.
Measure center height and level both ends
Measure the net at the center using the height required for your group. Then inspect both sidelines to confirm that the net is level and evenly supported. If the middle droops, do not automatically pull the system as tight as possible; first check the straps, pole joints, anchors, and cable routing.
Avoid Sagging Nets, Leaning Poles, and Anchor Failures
Most setup issues come from a mismatch between the surface, anchoring method, and tension level. A few careful checks before play can prevent the most common problems.
Do not overtighten portable equipment
A tight net is not necessarily a better net. Excessive tension can strain portable poles, anchors, and cables. Use only enough tension to create a stable, even playing net, then inspect the system again after it is raised.
Match stakes, sand anchors, or weighted bases to the surface

Grass, sand, indoor floors, and hard courts require different ways to secure a portable net. Ground stakes and guy lines may be appropriate in some outdoor settings, while weighted bases may be more suitable where ground penetration is not appropriate. Confirm that the selected system is rated for the playing surface before use.
Check cables, straps, pole joints, and boundary markers
Inspect visible connection points before play. Look for loose straps, poorly seated pole sections, shifted boundary lines, and anchors that no longer appear stable. If a component cannot be secured as intended, pause the setup rather than trying to compensate by increasing net tension.
Setup Tips for Indoor Gyms, Backyards, Beaches, and Community Events
Indoor courts: floor protection and existing sleeves
Indoor gyms may already have post sleeves or facility-provided equipment. If they do not, a weighted-base volleyball system may be considered where it is appropriate for the floor and space. Protect the surface as required by the facility and keep bases, posts, and surrounding equipment outside the active court area.
Grass and backyard courts: stakes, uneven ground, and weather
Backyard setups benefit from a level area and clearly marked boundaries. Uneven ground can affect post alignment and net height. If the system uses stakes or guy lines, make sure they are suitable for the ground conditions and visible enough to avoid becoming a trip hazard.
Sand courts: anchor depth and post stability
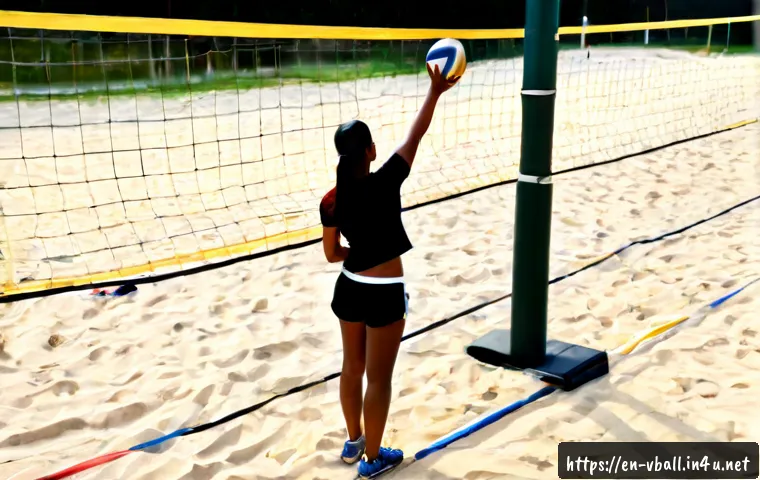
Sand changes how equipment is supported. Use anchors or posts intended for sand conditions, and check stability before the first serve. Because a specific system’s sand rating can vary, verify the product guidance instead of assuming a grass-oriented portable kit will work the same way.
Events and schools: faster setup, storage, and replacement-part planning
For events and school programs, repeatable setup matters. Keep boundary lines, straps, cables, and pole sections organized so inspections are faster. It is also practical to compare systems based on replacement-part access and storage needs, especially when equipment is assembled and removed regularly.
Choosing the Right Net
Best choice for occasional backyard play
A portable volleyball net kit may be a practical choice for occasional use if it matches the yard surface and can be anchored safely. Prioritize straightforward setup, visible court lines, and a system that can be packed away when not in use.
Best choice for frequent club or school use
Frequent use places more importance on durable poles, reliable tension straps, secure anchoring, and access to replacement parts. Compare storage requirements as well, since a system that is difficult to organize or inspect can slow down repeated setups.
When permanent installation or facility support makes sense
Permanent posts may be worth considering for a dedicated court with regular use. Before planning installation, confirm local facility rules, permit requirements, and any anchoring restrictions. Professional installation support may be appropriate when the site requires a permanent solution or when facility requirements are unclear.
Selection Criteria and Comparison Summary
Before choosing a volleyball net system, check these points: surface compatibility, required net height, anchor or base method, available safety clearance, storage needs, and replacement-part availability. For a one-time event, compare rental options against how much setup flexibility and surface-specific equipment you need. For a long-term court, compare permanent post requirements and whether installation support is needed. Review the product or service page for official specifications, surface guidance, and replacement-part details.
Final Thoughts
A playable volleyball court is built from more than a net stretched between two poles. Match the equipment to the surface, keep posts outside the boundaries, and measure the net at the center before play begins. Use balanced tension rather than force, and leave clear space around the court. These steps help create a setup that is more stable, easier to manage, and safer for players.
Useful Information to Keep in Mind
1. Regulation indoor court size is 18 meters by 9 meters.
2. Men’s competition height is 2.43 meters, and women’s competition height is 2.24 meters.
3. Recreational, youth, beach, and adaptive volleyball can use different heights.
4. The center measurement and both sidelines should be checked before play.
5. A clear safety zone helps reduce collisions with posts, walls, benches, and spectators.
Important Notes
Exact requirements can vary by league, age group, school program, tournament, and facility. Confirm the required net height and court rules with the relevant organizer. Also verify whether a portable system is rated for indoor, grass, sand, or hard-court use. Permanent installations may be subject to local rules, permits, or anchoring restrictions.
Frequently Asked Questions
Q1. What height should a volleyball net be for casual backyard games?
A1. Casual backyard games may use a height that fits the players, but youth and recreational programs can have their own rules. If the group follows a league or school format, confirm that organization’s required height. For reference, men’s competition height is 2.43 meters and women’s competition height is 2.24 meters.
Q2. Is a portable volleyball net worth buying, or should I rent one for an event?
A2. A portable system can be useful when you expect to set up repeatedly and have a suitable surface for its anchors or bases. Renting may be worth comparing for a single event, especially when you need surface-specific equipment or do not want to manage storage. Check what is included, such as boundary lines, bases, anchors, and replacement equipment.
Q3. How do I keep a volleyball net from sagging in the middle?
A3. Raise both sides gradually, measure the net at the center, and check that the sidelines are even. Inspect straps, cables, pole joints, and anchors before adding more tension. Avoid overtightening portable equipment, because too much tension can strain the poles, cables, and anchors.