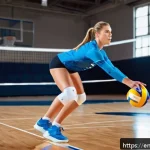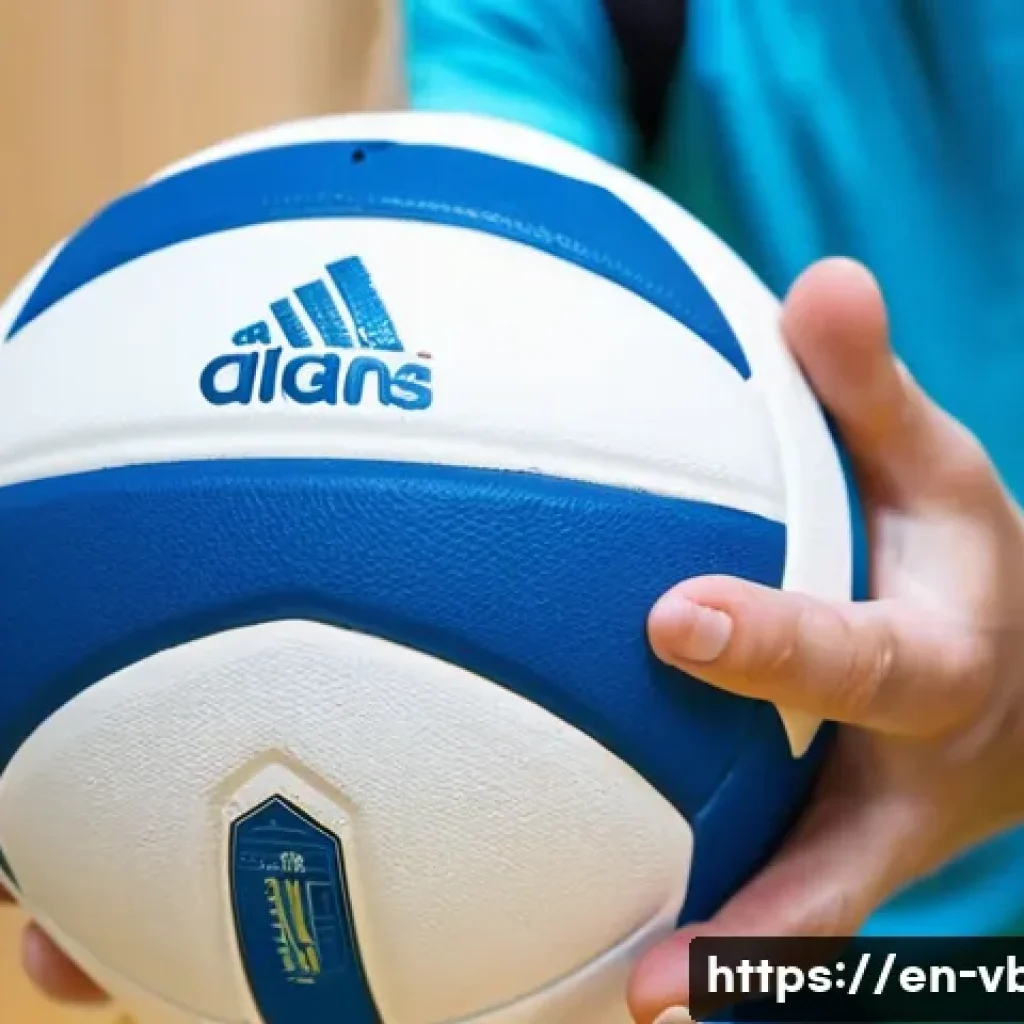
Hey there, fellow volleyball enthusiasts! There’s nothing quite like the feel of a perfectly maintained volleyball in your hands – the ideal grip, the consistent bounce, and that satisfying thud when you make a great play.

But let’s be real, our beloved balls take a beating on the court, and without a little TLC, their performance can quickly dwindle. From my countless hours playing and coaching, I’ve discovered that extending the life and maintaining the peak performance of your volleyball is simpler than you might think.
It’s not just about keeping it clean; it’s about preserving that ‘new ball’ feel for every serve and spike. Curious to keep your favorite ball in championship condition?
Let’s accurately find out how to keep your volleyball in prime condition! You know, in today’s world, where everything from professional equipment to casual gear can get pretty pricey, making your volleyball last isn’t just a smart move for your wallet; it’s also a nod to sustainability.
I’ve seen countless players replace balls far too soon just because they didn’t know a few simple tricks. Whether you’re a seasoned player or just starting out, understanding how to properly care for your volleyball can drastically improve your game experience and prevent unnecessary expenses.
I’ve always been a big believer in getting the most out of my gear, and believe me, a well-maintained ball truly performs better. So, if you’re ready to ensure your volleyball is always match-ready and feels fantastic every time you step onto the court, you’ve come to the right place.
We’ll definitely cover everything you need to know to keep your ball in top shape!
Giving Your Ball a Spa Day: The Right Way to Keep it Squeaky Clean
Gentle Cleansing for Peak Performance
After every game, especially if you’ve been playing outdoors or in a dusty gym, your volleyball needs a little love. I always make it a habit to give my ball a quick wipe-down.
Think of it like a mini spa treatment! I grab a soft, damp cloth – sometimes just warm water is enough, honestly – and gently wipe away any dirt, sweat, or grime that has accumulated on the surface.
For leather balls, this quick wipe is super important because excessive moisture can eventually lead to damage. You want to remove the grit that can degrade the material over time, but you definitely don’t want to soak the ball.
My experience has shown me that regular, gentle cleaning not only keeps the ball looking fresh but also helps maintain its grip and feel, which is crucial for those precise sets and powerful spikes.
It really makes a difference in how the ball responds to your touch.
When a Little More Muscle is Needed
Sometimes, a damp cloth just won’t cut it, especially if you’ve got stubborn dirt spots or scuff marks that just won’t budge. In these cases, I reach for a mild detergent.
And by mild, I mean something like a diluted dish soap – just a few drops in warm water. I dampen a cloth with this soapy mixture, wring it out really well so it’s not dripping, and then gently scrub the affected areas.
I’ve even used an old, soft toothbrush for those really tricky spots on occasion! The key here is to be thorough but gentle, avoiding harsh chemicals like benzene or solvents, which can absolutely ruin the ball’s coating and material.
After scrubbing, I grab a fresh, clean, damp cloth to wipe off all the soap residue. You absolutely want to make sure no suds are left behind, as they can discolor the ball or make it feel sticky.
Finally, and this is crucial, I dry the ball immediately with a clean, dry towel and then let it air dry completely in a well-ventilated area, away from direct sunlight.
I learned the hard way that leaving it wet can weaken the seams and degrade the material.
Pumping Up Your Play: Mastering Inflation for the Perfect Bounce
The Magic PSI and How to Check It
The right air pressure is absolutely fundamental to a volleyball’s performance. It’s a game-changer! An over-inflated ball feels like a rock, is hard to control, and can hurt your hands, while an under-inflated one feels sluggish, won’t bounce true, and can absorb too much impact, making passes and hits feel dead.
Trust me, I’ve played with both, and it’s frustrating! Most indoor volleyballs typically have a recommended pressure between 4.3 and 4.6 PSI (pounds per square inch).
Outdoor or beach volleyballs sometimes prefer a slightly lower pressure, around 4.3 to 4.4 PSI, because the softer playing surface can compensate for some of the ball’s firmness.
I always recommend investing in a good quality ball pump that has a pressure gauge – it takes all the guesswork out of it. Periodically checking the pressure, perhaps once a week if you play often, ensures your ball is always ready for peak performance.
It’s a small step that makes a huge difference in how the game feels.
Needle Etiquette: Keeping Your Valve Happy
Inflating your volleyball might seem straightforward, but there’s a little trick to it that can save your ball’s valve from damage. Before inserting the inflation needle into the ball’s valve, you MUST moisten it.
I usually just use a little water, but some pros swear by glycerin – even saliva works in a pinch! A dry needle can easily tear or damage the delicate valve, leading to annoying air leaks that are almost impossible to fix.
I’ve had a few good balls ruined this way early in my playing days, and it’s heartbreaking. Once the needle is lubricated, insert it gently and straight into the valve.
Avoid forcing it or wiggling it around. When you pump, do it slowly and in short bursts, checking the ball’s firmness frequently. This gradual approach prevents rapid air warming inside the ball, which can lead to inaccurate pressure readings.
After you’ve reached the desired pressure, remove the needle straight out, just as gently as you put it in. Taking care of your pump and needle, like wiping them clean after use and storing them properly, also contributes to their longevity and, by extension, your ball’s life.
| Common Volleyball Care Mistakes | How to Avoid Them for a Happier Ball |
|---|---|
| Leaving the ball in a hot car or direct sunlight | Store in a cool, dry, shaded place like a closet or gear bag. |
| Not cleaning the ball after use | Wipe down with a damp cloth after every session; use mild soap for stubborn dirt. |
| Over-inflating or under-inflating | Use a pressure gauge and lubricate the needle before inflating to the recommended PSI. |
| Using harsh chemical cleaners | Stick to mild soap and water only; avoid solvents like benzene. |
| Storing the ball deflated for long periods | Keep it at its recommended pressure, even when not in use, to maintain its shape. |
| Sitting on or kicking the volleyball | Remember it’s a volleyball, not a soccer ball or a chair! Treat it with care. |
Home Sweet Home: Storing Your Volleyball for a Longer Life
Escaping the Extremes: Temperature and Humidity
Where you keep your volleyball when it’s not in action plays a huge role in how long it lasts. This is something I learned pretty early on, often the hard way!
Extreme temperatures are the absolute worst enemies of your ball. Leaving a ball in a scorching hot car or baking it in direct sunlight can cause the materials to degrade rapidly, making the panels brittle or the glue weaken, leading to peeling and discoloration.
On the flip side, extremely cold environments, like a freezing garage during winter, can also make the ball hard and unresponsive, potentially leading to damage when you try to play with it.
High humidity is another no-no, as it can encourage mold or mildew growth, especially on leather balls, and weaken adhesives. I always tell my players to store their balls in a cool, dry, and moderately ventilated place indoors, like a closet or a dedicated equipment bag, away from windows or heaters.
It’s like finding a comfortable spot for your favorite houseplant; it just thrives better!
Giving Your Ball its Own Space
Beyond just temperature, the physical act of storing your volleyball matters. I’ve seen so many players just toss their balls into a heap in a corner, or worse, leave them deflated for extended periods.
This might seem harmless, but it can actually cause the ball to lose its perfect round shape over time. When a ball is deflated, the panels can develop wrinkles or creases that become permanent, affecting its flight and bounce.
It’s also not a good idea to stack heavy objects on top of your volleyballs. I mean, who wants a squashed ball? I always advocate for keeping your balls at their recommended inflation pressure, even in storage.
If you have multiple balls, a ball cart or a designated storage rack is a fantastic investment. It keeps them off the cold, potentially dirty ground, prevents them from getting squashed or rubbing against rough surfaces, and ensures good air circulation.
Just giving your ball a bit of respect in storage goes a long way in maintaining its integrity and that lovely, consistent feel we all chase.
Indoor vs. Outdoor: Tailoring Your Care for Different Courts
Leather vs. Composite: Understanding Your Ball’s Skin
It’s easy to think all volleyballs are created equal, but oh boy, are they not! The material of your volleyball dictates a lot about its proper care, and this is especially true when comparing indoor and outdoor balls.

Indoor volleyballs are typically made from leather or high-quality synthetic leather, designed for the smooth, controlled environment of a gym. These materials offer a fantastic feel and consistent performance, but they are more susceptible to moisture and abrasive surfaces.
My personal indoor ball, a trusty leather one, needs to be babied a bit more – a quick wipe-down after every session and never, ever letting it get soaked.
Outdoor balls, especially for beach volleyball, are usually crafted from more durable composite materials or rubber, specifically designed to withstand the harsher elements like sand, sun, and even a bit of water.
They’re built tougher, but that doesn’t mean you can neglect them. Understanding the ‘skin’ of your ball is key to giving it the right kind of care; a leather ball will react very differently to a cleaning agent than a rugged rubber one.
The Elements and Your Ball’s Resilience
Playing outdoors means your volleyball is constantly battling the elements. Sand, dirt, grass stains, saltwater, and direct sunlight are all part of the game, and they take a toll.
While outdoor balls are made to be more resilient, they still need attention. For instance, after a beach game, I always make sure to brush off as much sand as possible from the ball.
Sand can be abrasive and get into the seams, causing premature wear. If the ball has gotten wet, I’ll wipe it thoroughly with a dry cloth and let it air dry completely, away from harsh sunlight.
I never use a dryer, as the intense heat can be incredibly damaging to the ball’s structure and materials. For indoor balls, the main culprit is usually just sweat and dust from the court.
The care here is simpler: a damp cloth and mild soap if needed, then dry. The key takeaway here, from years of playing on all sorts of surfaces, is that adapting your cleaning and drying routine to the environment you play in is paramount.
It’s about respecting the specific demands placed on your ball.
Spotting the Signs: When Your Volleyball is Ready for Retirement (or a Break)
Visible Wear and Tear: More Than Just Scratches
Every volleyball has a lifespan, and even with the best care, eventually, it starts showing its age. It’s like an old friend; you know them well enough to see when they’re not feeling their best.
I’ve seen countless balls that are clearly past their prime, yet players keep using them, often to the detriment of their game. Beyond simple scuffs and minor abrasions, look for deeper signs of wear.
Are the panels starting to peel or separate from the carcass? Are there any visible cracks in the outer cover, especially along the seams? Deep cracks are a major red flag, indicating the material is breaking down.
Discoloration that can’t be cleaned away, or a noticeable change in the ball’s texture, can also be indicators that its structural integrity is compromised.
Sometimes, these issues can even affect the ball’s balance, making it fly unpredictably. Continuing to use a ball with significant physical damage not only impacts your performance but can also lead to inconsistent play, which is frustrating for everyone on the court.
Losing Its Spark: Air Leaks and Uneven Feel
Beyond what you can see, what you *feel* from your volleyball is just as important. One of the most common and frustrating signs that a ball is on its last leg is its inability to hold air, even after proper inflation.
If you find yourself having to pump up your ball before every single practice or game, there’s likely a slow leak somewhere. This could be due to a damaged valve (which, as we discussed, often happens from improper needle insertion), or a tiny puncture in the bladder itself.
While some minor leaks might be tolerable for a while, a consistently deflated ball will completely alter gameplay, making it soft and unresponsive. Another tell-tale sign is an uneven feel.
If you rotate the ball in your hands and it feels lumpy, unbalanced, or like it has flat spots, that’s a big problem. This usually means the internal bladder has shifted or deformed, or the panels are unevenly adhered.
When a ball loses its perfectly round shape, its bounce becomes unpredictable, and it simply won’t perform consistently. At this point, it’s probably time to respectfully retire your old friend and invest in a new one for optimal play.
Wrapping Things Up
Well, my friends, we’ve covered a lot of ground today on keeping your beloved volleyball in tip-top shape. It might seem like a lot of little things, but trust me, each small act of care adds up to a huge difference in the longevity and performance of your ball. From those gentle wipe-downs after an intense game to ensuring it’s properly inflated and stored, every step contributes to maintaining that fantastic feel we all crave. It’s not just about preserving an item; it’s about honoring the game we love and making sure every pass, set, and spike feels as good as the first. So, go out there, give your ball some love, and keep enjoying every moment on the court!
Handy Tips You’ll Wish You Knew Sooner
Here are a few extra nuggets of wisdom that I’ve picked up over the years, which can truly elevate your volleyball care routine:
1. Always carry a small, soft towel and a mini pump in your gear bag. This makes quick clean-ups and inflation checks super easy, no matter where you play. You’ll thank yourself later!
2. Consider investing in a mesh ball bag instead of a solid one, especially for outdoor balls. It allows for better air circulation, which helps dry the ball naturally and prevents moisture buildup after a sweaty game or an unexpected sprinkle.
3. If you play beach volleyball frequently, a small, soft brush can be your best friend for gently dusting off sand from the seams and crevices before storage. Sand is surprisingly abrasive!
4. For those stubborn scuff marks on composite or rubber balls, a magic eraser (the kind used for household cleaning) can sometimes work wonders, but always test it on an inconspicuous spot first to ensure it doesn’t damage the material.
5. Have a dedicated “game ball” and a “practice ball” if you play very often. This can help extend the life of your premium game ball, saving it for when performance truly matters, and letting your practice ball take more of the daily wear and tear.
Key Reminders for a Happy Volleyball
To recap, giving your volleyball the care it deserves is a simple yet impactful way to ensure consistently great performance and extend its lifespan. Remember to clean your ball gently after every use, adjusting your method for indoor leather versus outdoor composite materials. Always maintain the correct air pressure, using a lubricated needle for inflation to protect the valve. Proper storage in a cool, dry place away from extreme temperatures and direct sunlight is also vital for preserving its shape and material integrity. Finally, listen to your ball; pay attention to visible wear and tear, and any changes in how it feels or holds air. By following these simple guidelines, you’re not just taking care of equipment; you’re investing in countless more hours of fantastic volleyball. Keep spiking, setting, and serving with confidence!
Frequently Asked Questions (FAQ) 📖
Q: How often should I clean my volleyball, and what’s the best way to do it without causing damage?
A: You know, this is a question I get all the time, especially from players who are starting to invest in nicer balls! From my own experience, and what I’ve seen with countless players, giving your volleyball a quick wipe-down after every use is a game-changer, especially if you play outdoors or on sandy courts.
That grime really builds up faster than you think, affecting grip and even the ball’s feel. For a deeper clean, I recommend tackling it once a week if you’re playing regularly, or after any particularly muddy or dusty session.
Now, for the “how-to” part, it’s actually super simple, but there are a few golden rules I live by. First, grab a soft cloth and some warm water. If it’s just light dust, a damp cloth will do wonders.
But for those stubborn dirt marks or a bit of stickiness, a mild, non-scented hand soap or a few drops of diluted detergent works wonders. I usually put a tiny bit on the damp cloth, lather it gently, and then wipe down the ball, paying extra attention to those dirty panels.
I’ve found that using an old toothbrush for really tough spots, like those textured areas on indoor balls, can work too, but be super gentle! The absolute key here is rinsing and drying.
You don’t want any soap residue left on the ball because it can actually attract more dirt or even affect the material over time. So, I always follow up with a second clean, damp cloth to wipe away all the soap film.
And this is crucial: immediately dry the ball with a clean, soft towel. Never, ever let it air dry completely when it’s still soaking wet, as excessive moisture can weaken the adhesive that holds the panels together, leading to peeling or discoloration.
Trust me, I’ve seen it happen! Once it’s dry to the touch, let it air out in a well-ventilated spot for a bit before putting it away, just to make sure every last bit of moisture is gone.
This simple routine has kept my favorite balls feeling crisp and new for ages, and it’ll save you money on replacements, too!
Q: What are the best ways to store my volleyball to prevent damage, and how important is proper inflation for its longevity?
A: Okay, so once you’ve cleaned your ball, where do you put it? And what about that air pressure? These two things are huge for extending your volleyball’s life, and honestly, they’re often overlooked.
I’ve learned the hard way that a poorly stored or improperly inflated ball can quickly go from championship-ready to ‘meh.’Let’s talk storage first.
The biggest takeaway here is: avoid extremes! Leaving your volleyball outdoors, in the trunk of your car, or in a super hot garage or freezing shed is a recipe for disaster.
Extreme temperatures, especially direct sunlight and intense cold, can cause the material to break down, leading to cracking, peeling, or even permanent deformation.
I always, always store my balls indoors, at room temperature, in a clean, dry, and preferably well-ventilated spot. Think a closet, a gear bag inside your house, or a dedicated ball rack if you have a collection.
For longer off-season storage, like during winter, I actually recommend letting a little bit of air out – just enough to relieve some pressure on the seams without making it totally flat.
This subtle trick helps prevent stress on the material and keeps it from developing flat spots. Now, onto inflation. This is critically important for performance and longevity.
Every volleyball has a manufacturer-recommended PSI (pounds per square inch) level, usually printed right near the valve. For most indoor balls, we’re talking around 4.3 to 4.6 PSI.
I can’t tell you how many times I’ve picked up a ball that felt either rock-hard or squishy, and both are bad! An over-inflated ball is harder to handle, can sting your arms (ouch!), and puts unnecessary strain on the seams, making it more prone to bursting or cracking.
On the flip side, an under-inflated ball feels dead, won’t bounce consistently, and can affect your passes and sets. My go-to is a good quality ball pump with a pressure gauge.
Before every session, I give my ball a quick check and adjust as needed. When you’re inflating, always, always lubricate the needle first – a tiny drop of glycerin oil (or even a little bit of saliva in a pinch!) on the needle before inserting it into the valve is a must.
This prevents damage to the valve, which, trust me, is a pain to fix if it starts leaking air! Getting the pressure just right ensures optimal performance and drastically extends the life of your ball.
It’s a small effort for a huge return, keeping that sweet spot of responsiveness and durability.
Q: What common activities or “don’ts” should I avoid to make my volleyball last as long as possible?
A: This is where we get into the nitty-gritty of preventing premature wear and tear. You’ve got your cleaning and storage down, which is awesome, but there are a few everyday habits I’ve seen that can really shorten a volleyball’s life.
Think of these as the “unspoken rules” of ball care that I’ve picked up from years on the court! First up, and this might seem obvious but it’s often overlooked: avoid concrete and asphalt surfaces whenever possible.
Volleyballs, especially the higher-quality composite leather and synthetic ones, are designed for specific playing surfaces – indoor courts, grass, or sand.
Playing regularly on rough, abrasive surfaces like concrete is like taking sandpaper to your ball. It wears down the outer cover incredibly fast, leading to scuffs, fading, and eventually, peeling and cracking.
If you absolutely have to play on a hard court, consider having a dedicated outdoor ball, but even then, be prepared for it to show wear much quicker.
Next, and this one makes me cringe a little every time I see it: don’t kick your volleyball! I know, I know, sometimes it’s just instinct, or maybe a playful moment, but volleyballs are not designed for foot contact.
Kicking can put immense, uneven pressure on the panels and seams, distorting the ball’s shape or even causing internal damage you can’t see right away.
Over time, this leads to an unpredictable bounce and a shorter lifespan. Stick to hands-only contact, as the game intended! Another “don’t” I’m passionate about: don’t sit on your volleyball.
We’ve all seen players do it, and maybe even done it ourselves! But a volleyball isn’t a stool. Your body weight, especially if you’re like me (not exactly a featherweight!), can distort the ball’s perfectly round shape over time.
This can lead to imbalances, affecting its flight and bounce, which is the last thing you want during a crucial match. Just grab a bench or the floor instead!
Finally, be incredibly cautious with harsh cleaning chemicals or solvents. While I mentioned a mild diluted detergent for tough stains, anything stronger, like benzene or abrasive cleaners, can severely damage the ball’s coating and material, leading to discoloration, stickiness, or accelerated wear.
And for the love of all things volleyball, never, ever put your ball in a dryer! High heat is a death sentence for the materials and adhesives. If it gets wet, air dry it naturally in a well-ventilated area.
By being mindful of these common pitfalls, you’ll not only preserve that “new ball” feel but also get so many more hours of fantastic play out of your beloved volleyball.
Trust me, these small habits make a monumental difference!